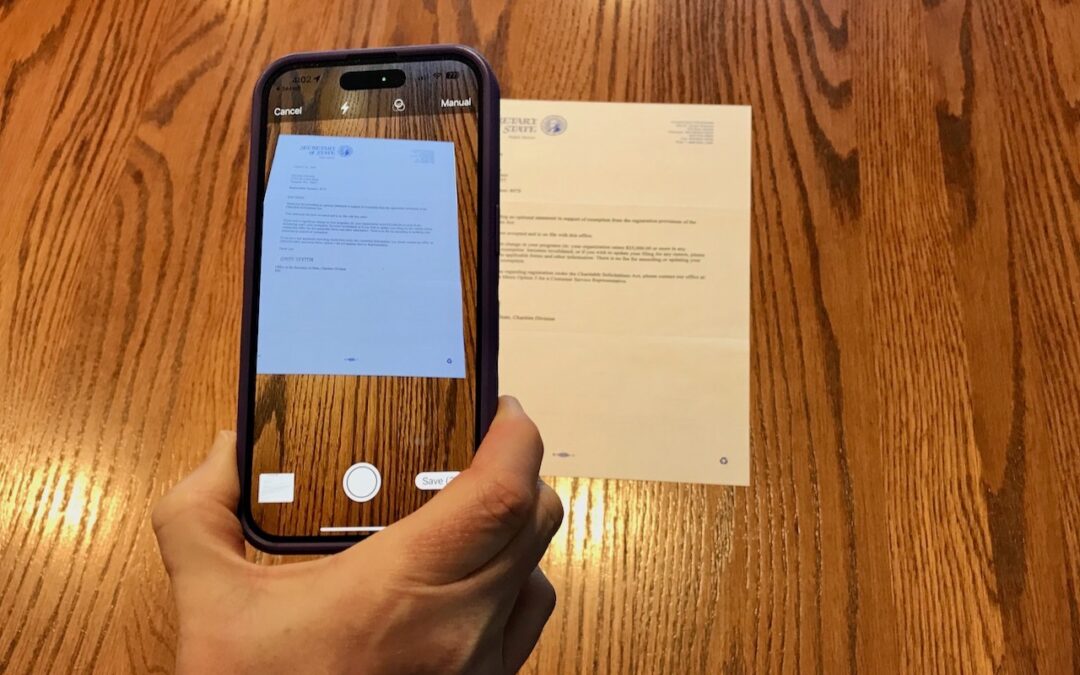
On occasion, we all need to scan a document—an invoice, a recipe, instructions from a book—but far more people have an iPhone or iPad than a hardware scanner. Luckily, Apple has built a scanning capability into iOS, iPadOS, and macOS for some years now. The next time you’re faced with a piece of paper that you need in digital form, follow the instructions below.
Scan Directly with an iPhone or iPad
The little-known key to scanning with an iPhone or iPad is the Files app, which lets you scan one or more pages and save a PDF anywhere you like. Since it’s particularly easy to use iCloud Drive with Files, it’s a good way to create a file you can work with on your Mac later. (You can also scan into a note using the Notes app, but that’s mostly useful for storing information rather than creating files you can upload to the Web, send via email, or share in other ways.)
- Open the Files app, tap Browse in the toolbar, and navigate to the folder where you want the scanned document to end up.
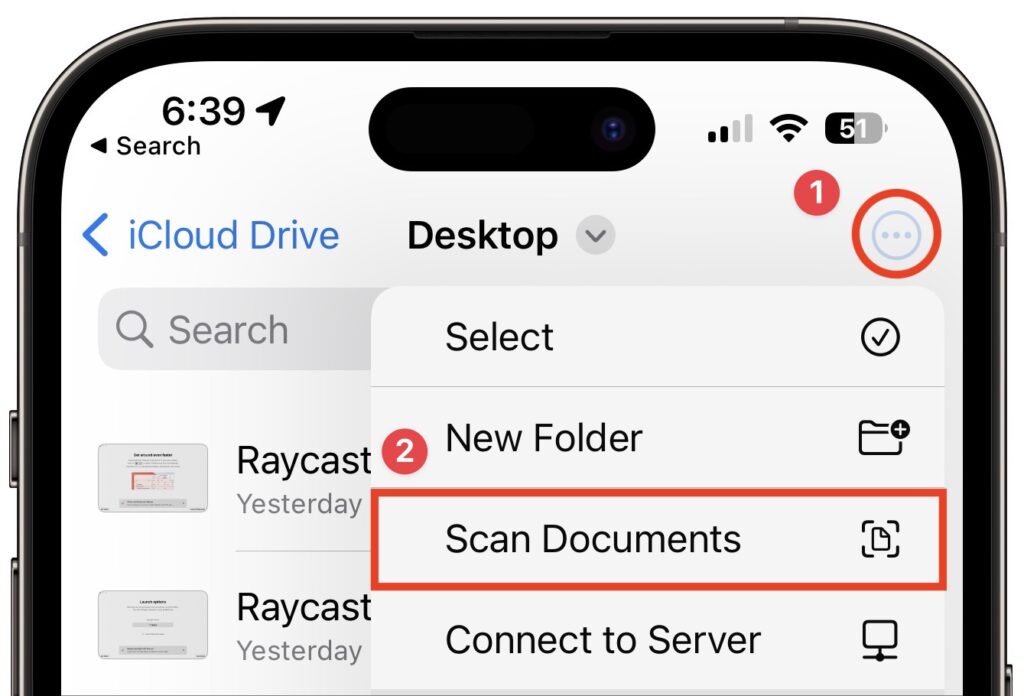
- Tap the
 icon at the upper right and select Scan Documents.
- The camera viewfinder appears. At the top of the screen, note the controls for the flash (the lightning bolt), the color filter, and the Auto/Manual toggle (below left). Immediately tap Auto to switch to Manual—we recommend using Manual until you’ve become fluid enough with the controls to let your device scan for you. You seldom need to change the flash setting, but you can force the flash on or off if you like. Similarly, the color filter option defaults to a color scan, but you can set it to grayscale or black-and-white if you want. It’s easier to make that change afterward.
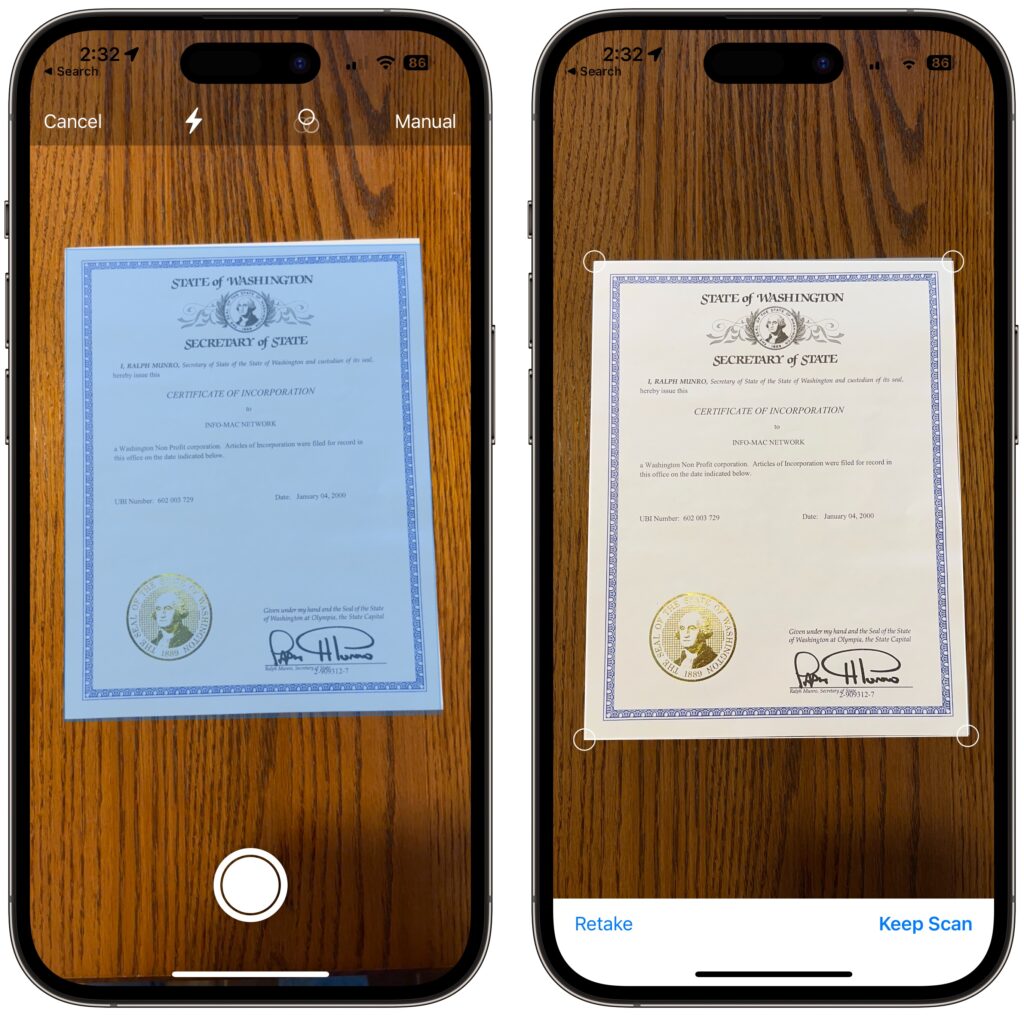
- Hold the iPhone steady so it can detect the edges of the paper. When it has, tap the round white shutter button to take a photo (above left). In Auto mode, it will just keep taking images for you, which is efficient with multiple pages but stressful if you aren’t ready.
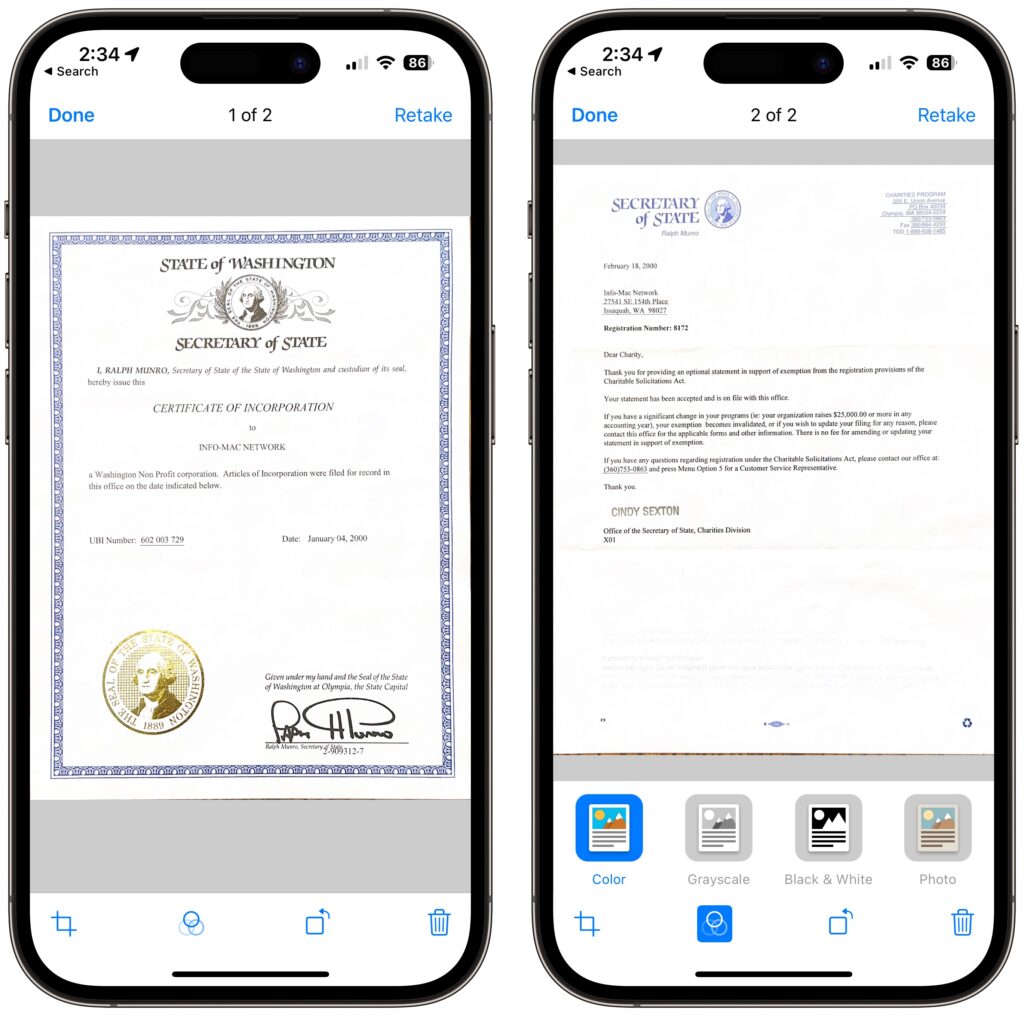
- Examine the scan to see if it looks good. You can drag the corners to adjust the selection to capture just paper, or if the image isn’t right, tap Retake for a do-over (above right). When you have it as you want it, tap Keep Scan.
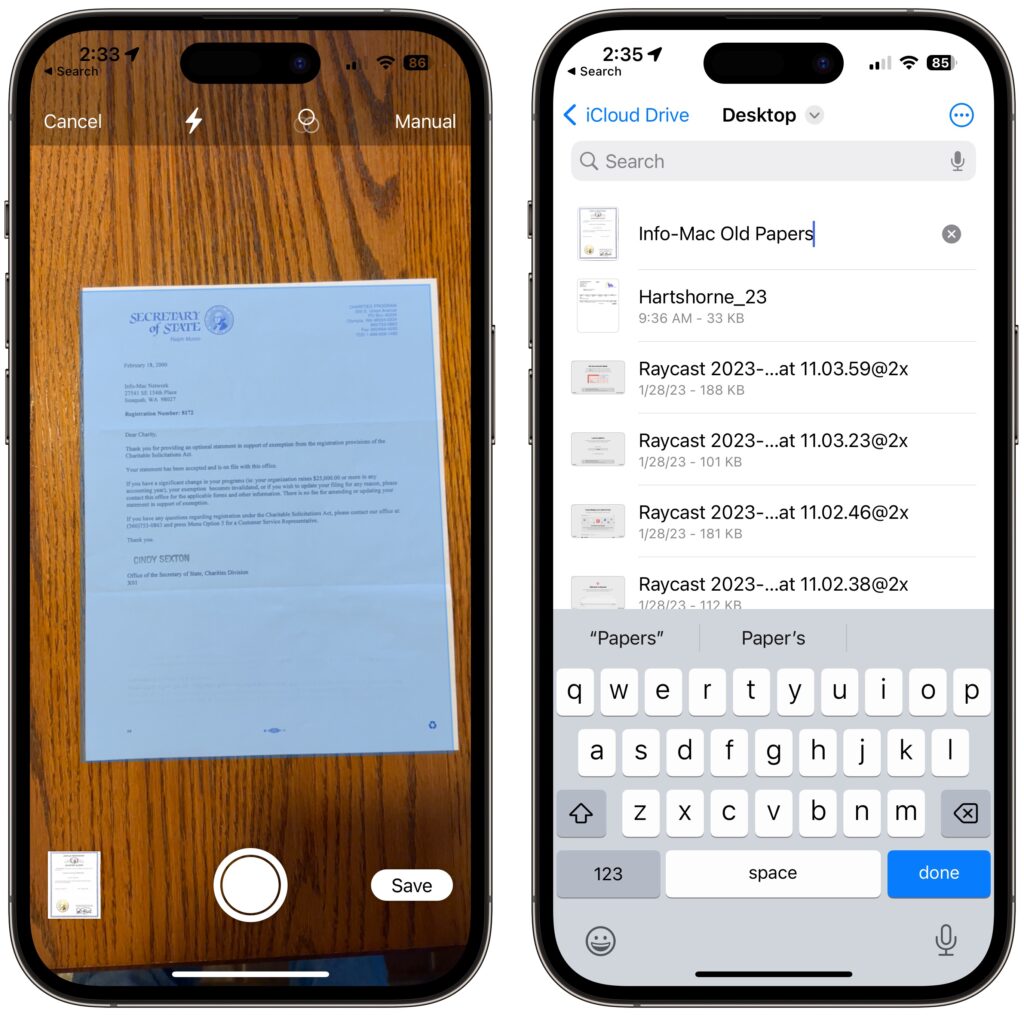
- If you want to scan additional pages, put them in the viewfinder and repeat Steps 4 and 5 (below left). Or, if you’re done, tap Save and jump directly to naming your file (below right).
- If a page isn’t exactly the way you want it, tap the image well to the left of the shutter button to make changes. On the edit page, the crop
 icon at the bottom returns you to the previous screen to adjust the corners again. The color filter
  icon lets you choose from Color, Grayscale, Black & White, and Photo—stick with color or grayscale for most documents. If the document came in at the wrong orientation, tap the rotate
  icon. If the image still isn’t to your liking, you can retake it or tap the trash
  icon to delete it. If you’ve scanned multiple documents, you can swipe between them. Tap Done when you’re finished, and return to Step 6 to save.
Scan to Your Mac with Your iPhone or iPad
It’s easy enough to save a scanned document to iCloud Drive or another file sharing service so you can access it on the Mac or move it from the Files app to the Mac. But if your goal is to scan directly to the Mac, you can do that too.
In Preview, choose File > Import from iPhone > Scan Documents. (Preview will know about all your devices, so it will have sections for each device.) A dialog will appear on the Mac, and your device will immediately switch to the scanning interface.
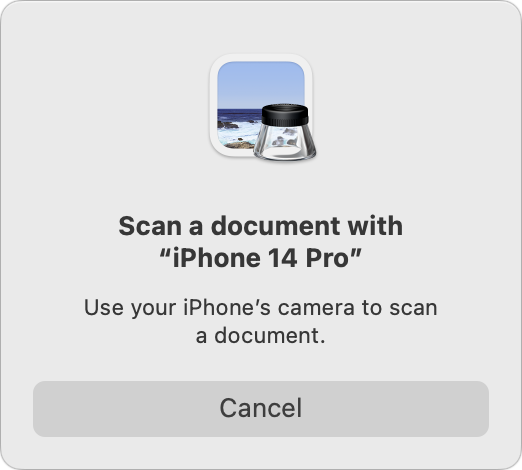
Everything works just as it does if you initiated scanning from the device, including the Auto/Manual switch and the need to tap Save when you’re done. However, instead of saving the document to Files, it will appear as a new document in Preview, where you can work with it like any other PDF and save it to your drive.
Final Thoughts
There are two caveats to scanning documents using your iPhone or iPad:
- This approach to scanning does not do optical character recognition (OCR) to make the scanned text selectable—the resulting PDF pages are just images. Online tools can perform OCR on a PDF; we’ve seen good results from AvePDF’s OCR PDF tool. This might not be a good idea with sensitive documents.
- Scanned documents tend to be large. If your scan ends up too big to share via email, for instance, other online PDF compression tools can shrink files. If you use AvePDF to OCR your document, another click on its Hyper-Compress PDFs tool can compress the same document by as much as 90%.
Overall, you’ll probably get better quality from a hardware scanner—particularly a flatbed—because it’s easier to position the pages perfectly, the light is stronger and more even, and there’s no need to deskew (straighten) the scanned page images, as Apple’s software attempts to do when you’re not directly over the page. But it’s hard to beat the convenience of a quick scan with your iPhone when quality isn’t paramount.
Thanks for reading the MacEdge blog.

