
Time Machine Backups
By Sophie Spaan; Edited by Anthony Fiandaca
Backing up, Restoring, and Protecting Your Files
Time Machine is a backup utility built into macOS 10.5 Leopard and later. This utility provides a simple interface for creating, accessing, restoring, and protecting your data. We will cover how to configure Time Machine, backup, set up your backup schedule, and restore a backup onto your Mac. Be aware that the steps in this article apply to the MacOS 15; if you are on an older MacOS, things may differ. You can always make an appointment to come in for a consultation.
Initial Setup
The initial setup of your Time Machine backup is fairly straightforward. To begin, you will need an external Hard Disk Drive (HDD) or Solid-State Drive (SSD). We recommended capacity no less than twice your computer’s internal storage; for instance, a 512GB Mac should have a backup drive of 1TB, minimum. A great place to find your new backup drive is here, at MacEdge; our staff can explore the many options for reliable backup drives, and can even assist with the initial setup. Setting up a new backup to Time Machine will delete the current contents of a drive. If you are going to use a drive you already own, you should know what is on that disk.
Plug in the Drive
Start by plugging in your backup drive to one of the available USB ports. If your plug doesn’t fit you may need an adapter, which you can get here at MacEdge. When performing a backup, you should plug your Mac into power, if it isn’t already. Once your drive shows up on the desktop or in the Finder, you are ready to configure.
Open System Settings
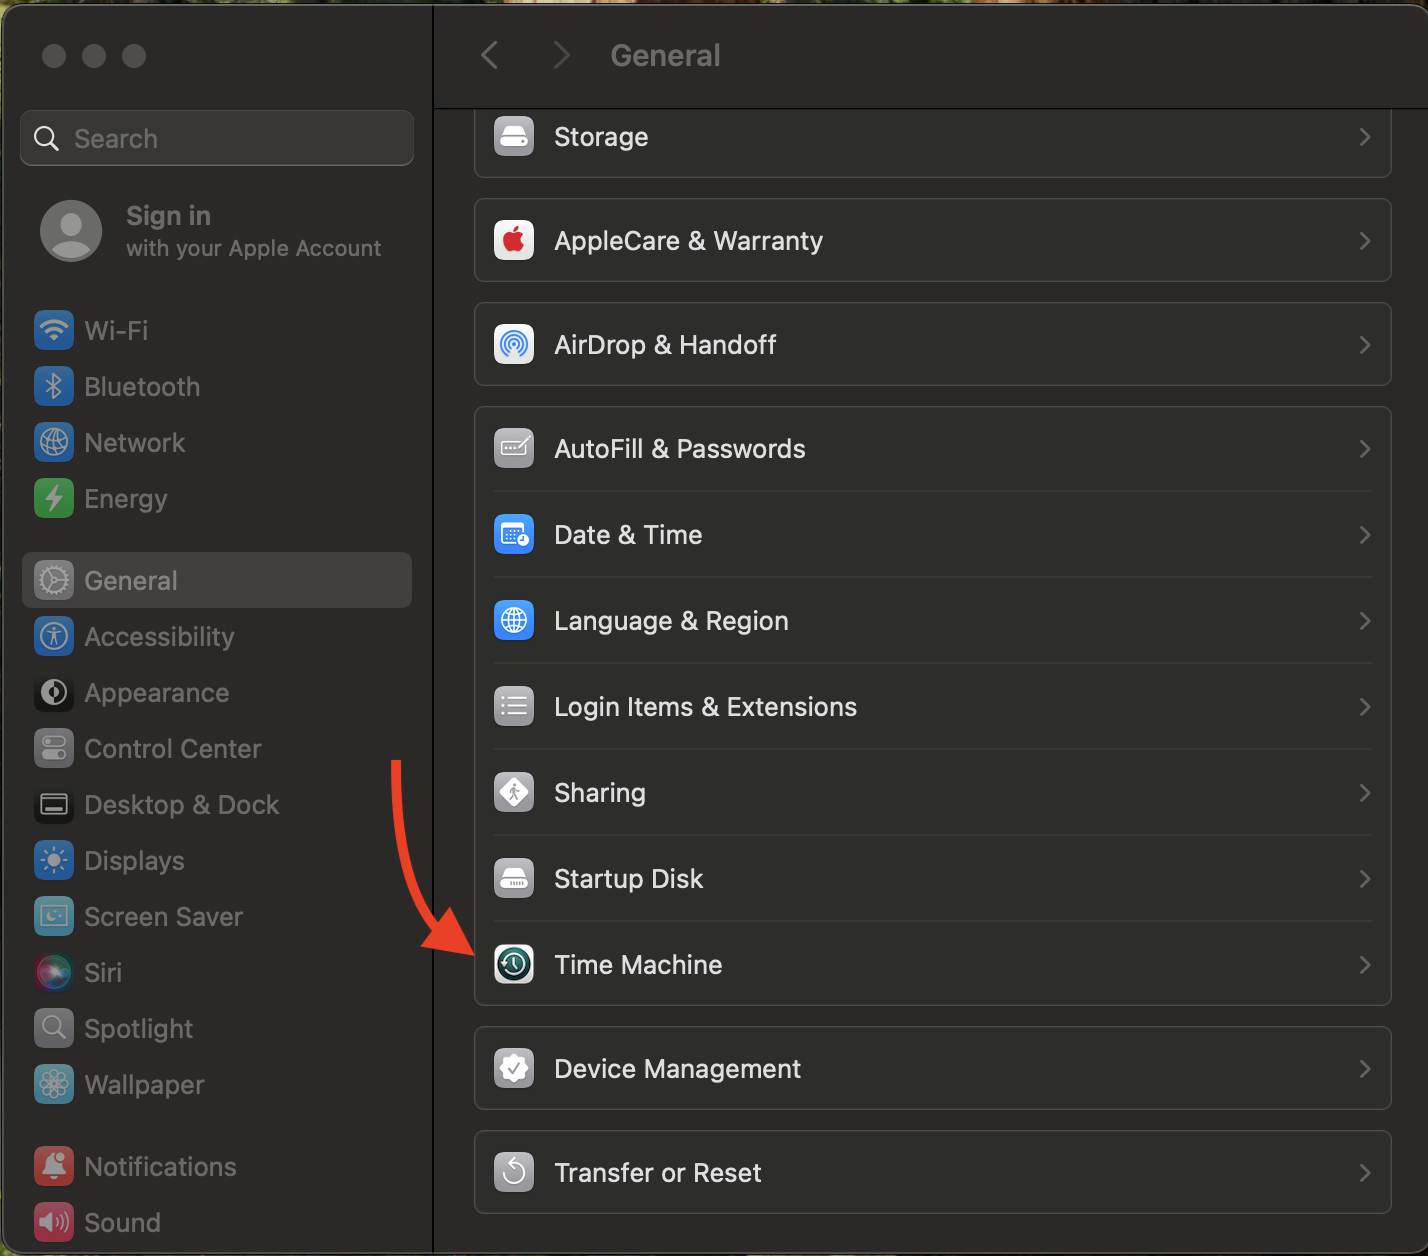
Open System Settings by clicking on the Apple logo in the upper-left corner on your Mac, then click on System Settings. When the System Settings window opens click on “General” on the left hand side of that window. The General category contains basic system tools, such as storage, and Time Machine. On the right hand side under general, scroll down to “Time Machine” under the General category on your Mac. This menu contains basic information on any backup drives you may have set up in the past. This menu also gives control over timing of automatic backups, and other general configuration tweaking settings.
Add Backup Disk
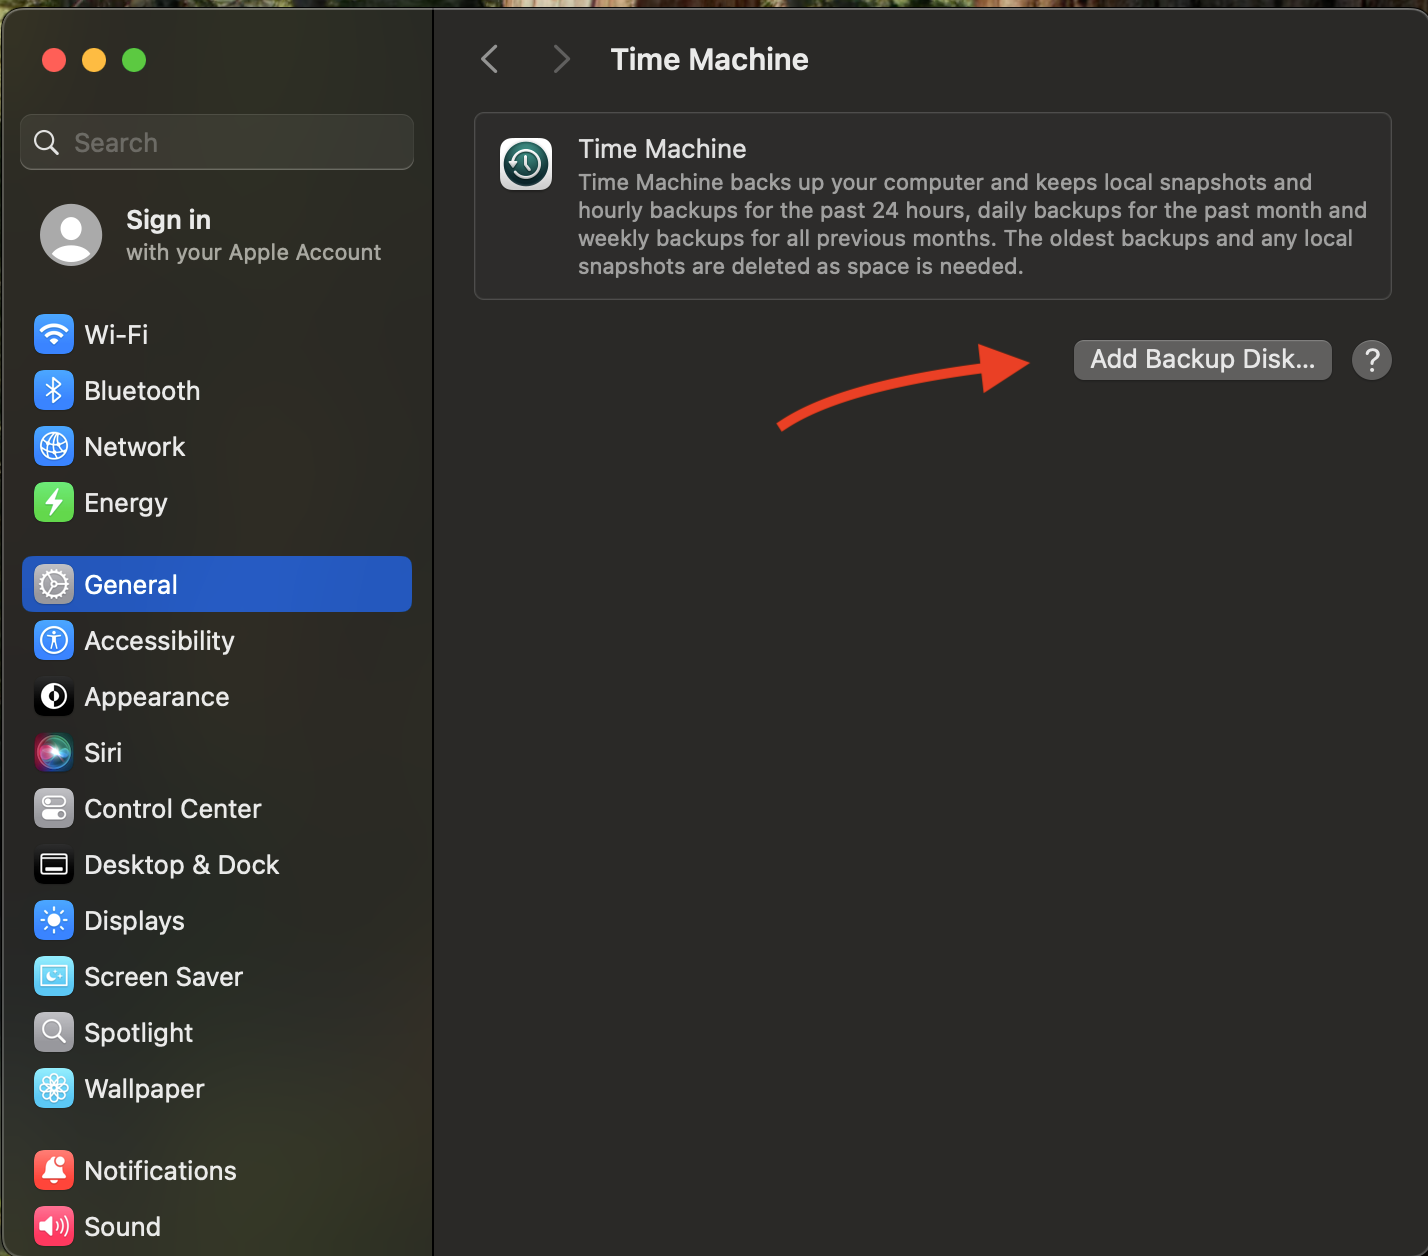
If not previously set, you will see an “Add Backup Disk” button under a blurb about what Time Machine does. Click on this button, select the name of your external drive from the list, then click “Set up disk.” If you are setting up a new drive with existing backup drives, you will be able to add one by clicking on the ‘+’ button under the list of existing backup drives.
Setup Backup Options
You will be shown options for encrypting your backups. If you keep information such as tax information, or HIPPA-protected data on your Mac, you will want to add an encryption password. You can turn off encryption by flipping the “Encrypt Backups” switch to the “off” position. We suggest this if you do not need to have encryption. You can also configure a custom usage limit in this menu, but we advise against doing this.
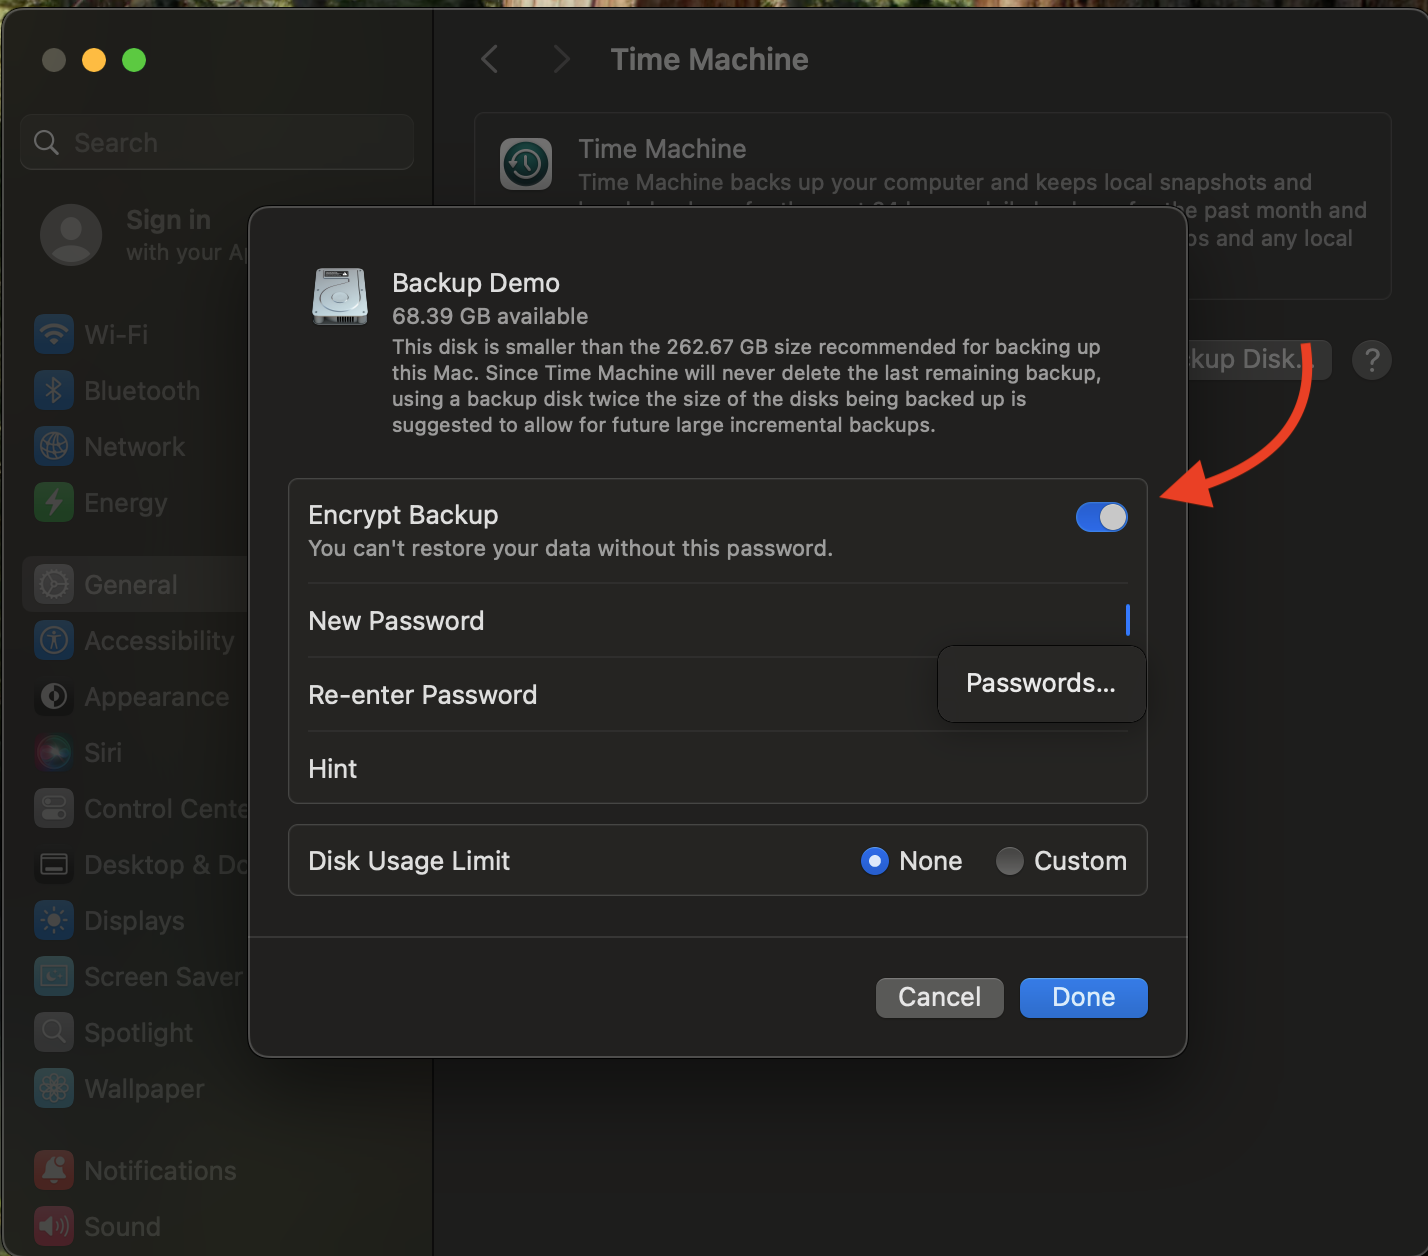
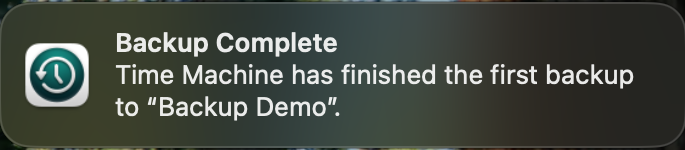
Click “Done,” and your Mac will automatically start a 100 second count-down to your first backup. Simply leave your Mac on and connected to power. When complete, you will see a pop-up in the top right corner stating that your Mac has successfully completed to your selected disk; an example of this message is shown below.
Accessing Backups
Time Machine keeps your documents stored and protected, ensuring that if you accidentally delete a file, you can simply restore that document’s most recent backup. There is a simple way to access a file’s backed-up copy in Finder with the TimeMachine application. This tool will help you navigate your Mac, and restore individual files.
To begin, open the Time Machine application, located under Launchpad > Other > Time Machine. You will be greeted with a menu displaying your computer’s “root” directory at the current time. You will have two arrows to the right of your view, one allows you to roll back to your prior backups, one allows you to go forwards.
To restore a particular file, first head to the folder where it was within the “Today” tab, then use the up arrow to navigate back in time until you find the file you are looking for. To restore this file, once you find when, and where it is, simply click on the document, and click “restore;” this will place the document back where you found it on your machine.
Backing Up Manually
There are numerous reasons you might want to back up your Mac manually. Perhaps you don’t save a lot of data, or only work periodically on your Mac, or maybe you are backing up before a repair. You can change “hourly backups” to “manual,” this means you will need to tell your Mac to backup every single time you want it to. If you haven’t backed up in a long while, your Mac might give you a reminder to back up.
To manually back up your Mac, click on the Time Machine symbol on the menu bar, and click “Backup Now.” (The symbol looks like a clock with a counter-clockwise arrow around it.) This should start a backup. You will know your backup is done when the two arrows surrounding the clock stop swirling around the clock logo, and the icon returns to a singular arrow.
Restoring a Mac from a Backup
There is a multitude of reasons you may need to restore your computer’s data. It is often a troubleshooting step, or you might have just bought a new Mac. No matter the case, with the power of Time Machine, preparing your Mac for use is easy. If you are having an issues restoring a like this make an appointment here at MacEdge.
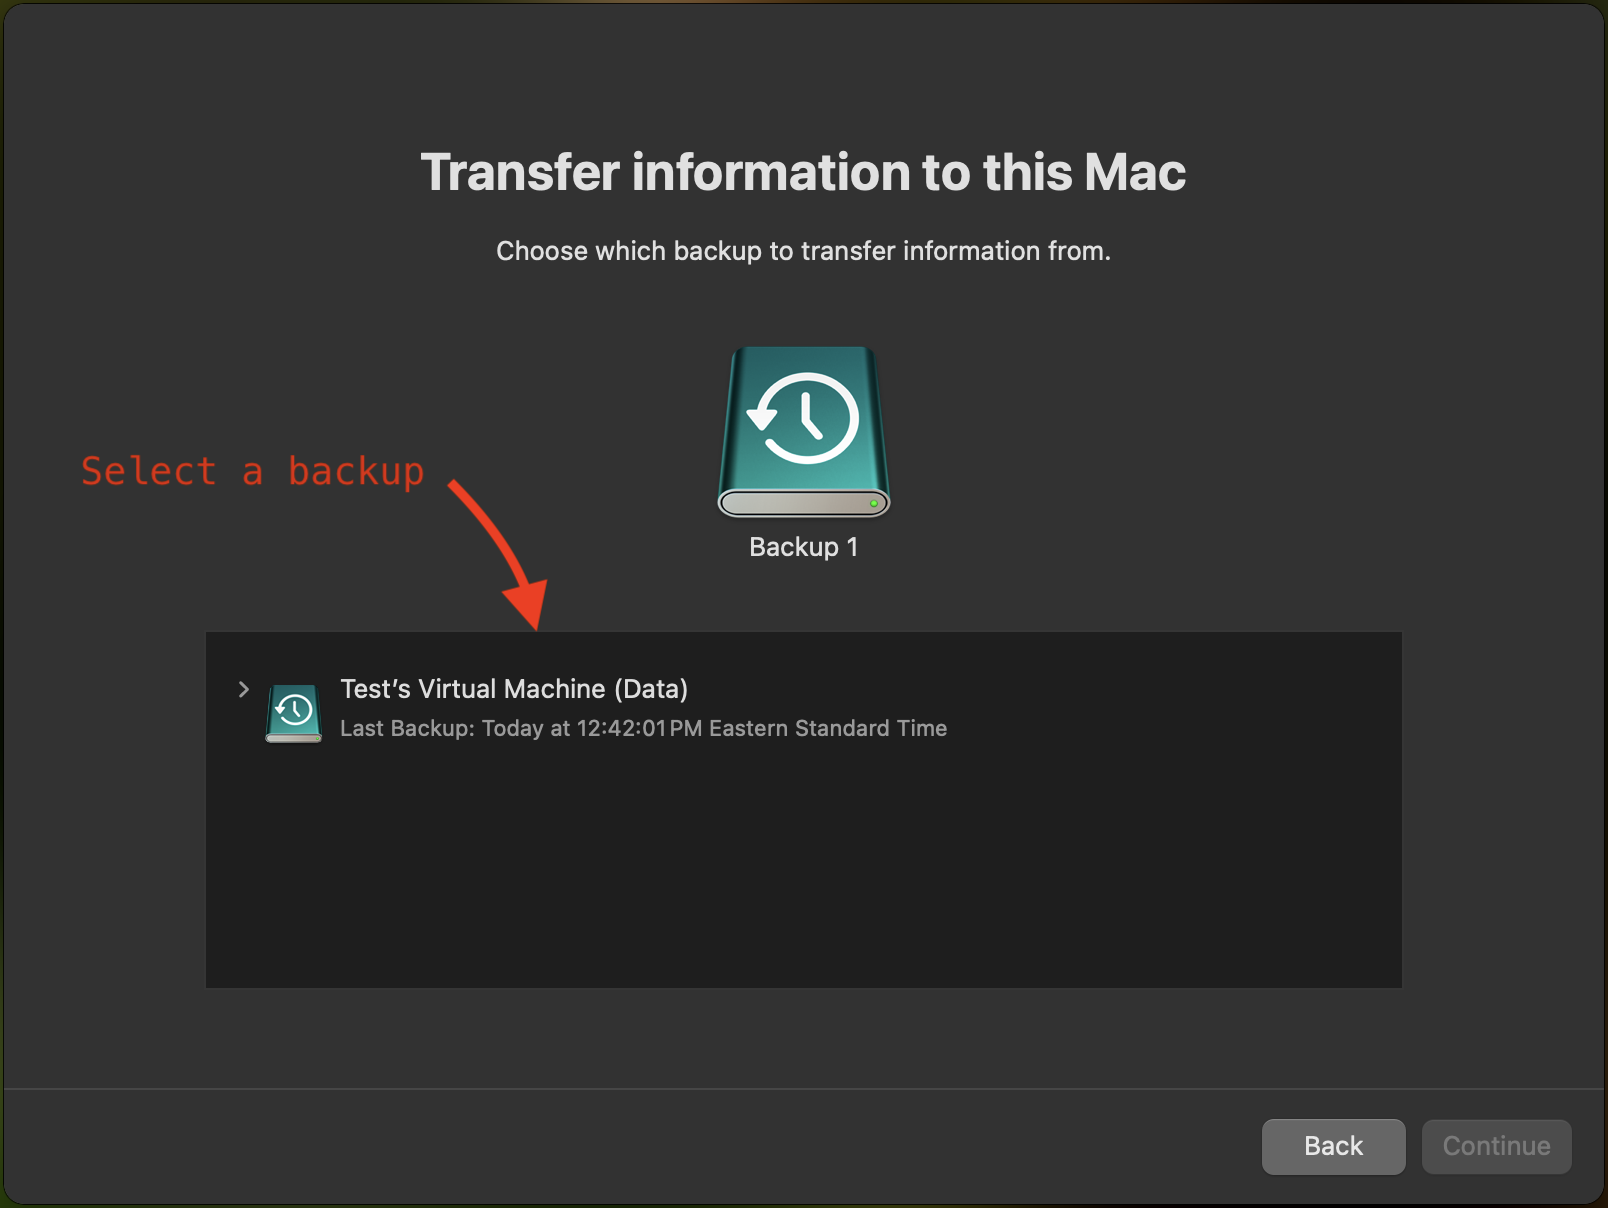
During initial setup of a new or restored Mac, connect your Time Machine backup drive to the computer. You will be prompted to restore your Mac from a backup shortly after connecting the device to WiFi. At this stage, you will plug your backup hard drive into the Mac, and click “Restore from Backup.” You will be requested to select your data source, you need to select the name of your Time Machine backup drive, and allow it some time to scan the disk.
After the drive has been scanned, you will see a list of checkboxes. These represent categories of data on your backup, and will be broken down by users. You will see a checkbox for each user of your computer, and you will have one for things such as Applications or Settings. This can be used to set up a new computer for a family member if you were sharing a machine, or to exclude categories of files you might not want anymore.
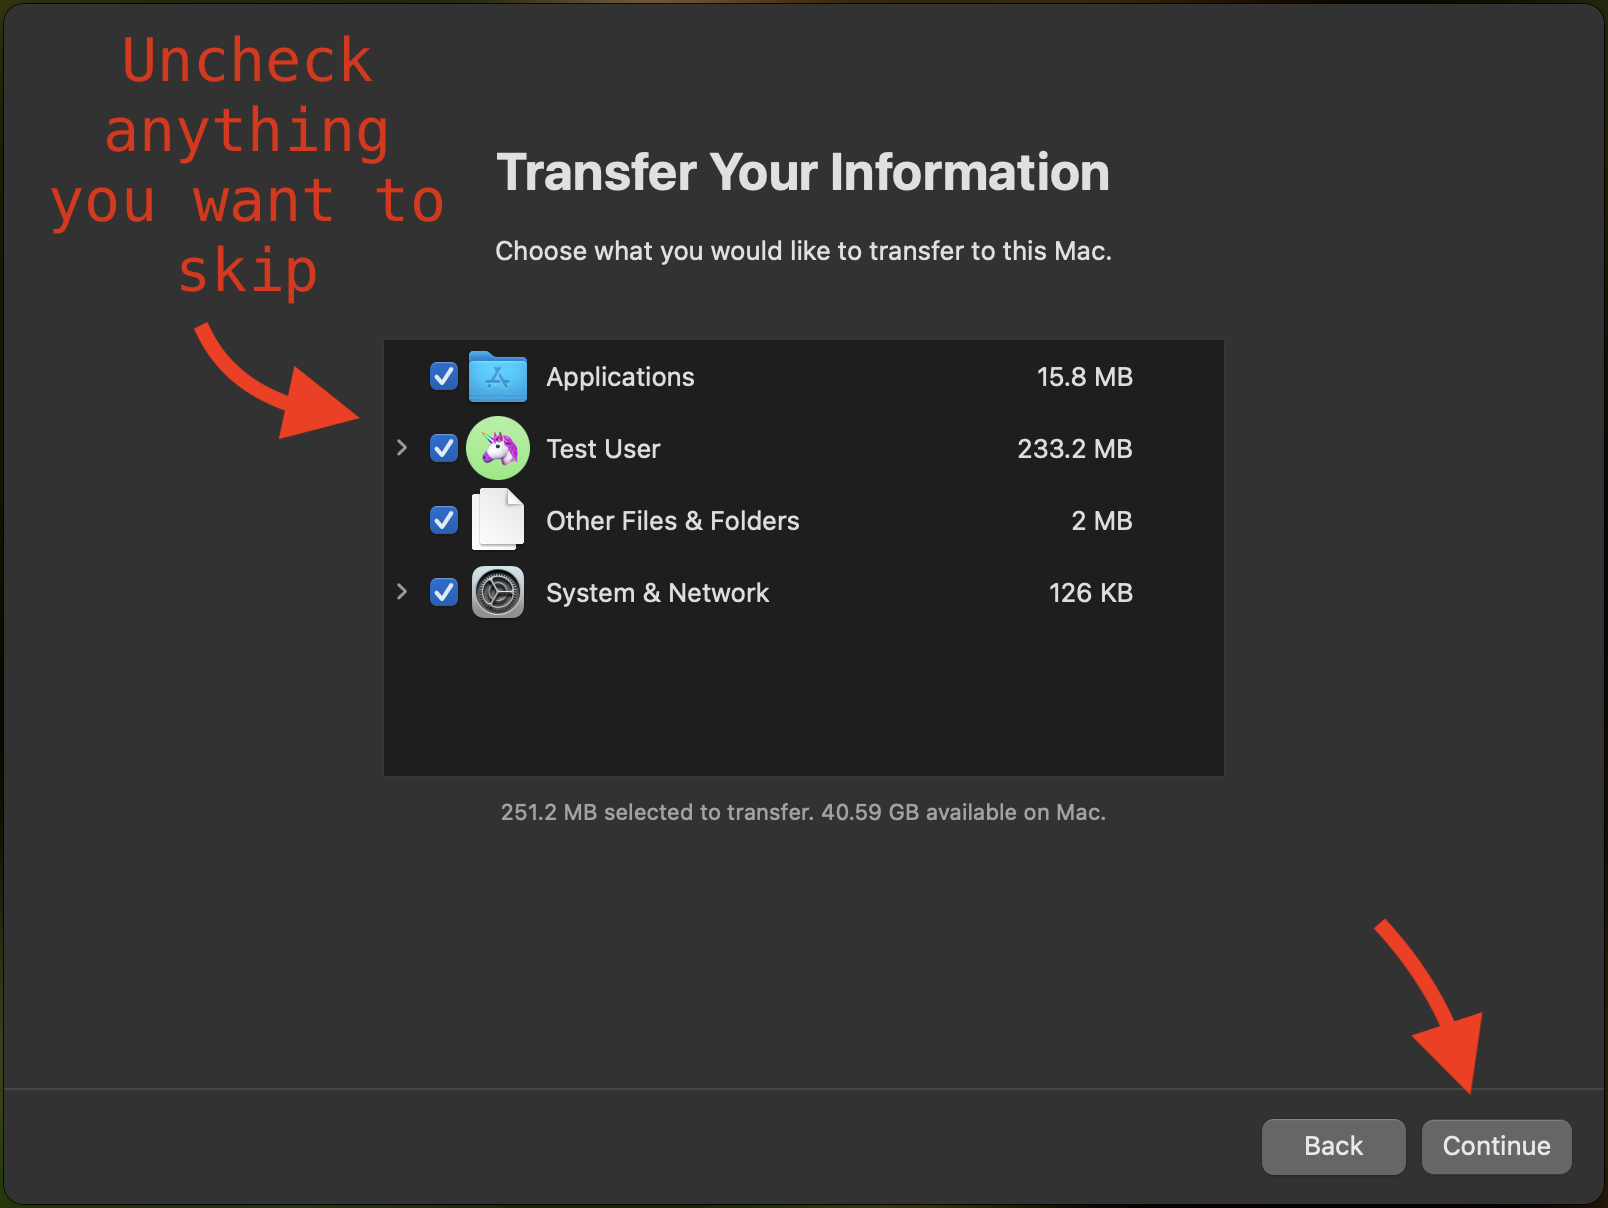
Once you’re happy with your selection, you can click the “next” button, and allow your Mac some time to gather, sort, and place the files where they need to go. When it’s all done, your Mac should be nearly identical to how it was before.
Off-Site Backup Solutions
It may be a good idea to have a secondary backup in the cloud. iCloud storage for your Desktop and Document folders, as well as iCloud Photos are often more then enough for many users. We have another article on how iCloud setup and management works, if you want to read. Let’s say that either you’ve lost your Time Machine drive, or some disaster has destroyed it and your computer; this is where offsite backups come in clutch. Beyond iCloud, we would suggest Backblaze.
Unlike a Time Machine backup, you can’t plug a Backblaze backup into your Mac and restore it in a matter of a few minutes to hours; you have to set up a blank Mac, download the Backblaze program, and select “Inherit Backup State.” You can also visit the Backblaze website and pay a fee to have the Backblaze team send you a hard drive with all of your backup data on it.
If you decide to use Backblaze you can you use our affiliate link, and MacEdge gets credit for your purchase.
The biggest drawback to an offsite backup is the speed, or, the lack there-of. Restoring a cloud backup, with hundreds of gigabytes of data, can take hours, days, or even weeks, depending on your connection speed. Shipping a hard drive can take many days or weeks, as these devices need special shipping and handling to prevent them from being damaged in transit. Despite the drawbacks, there are many reasons to keep an offsite backup, in addition to your onsite backup.
- An onsite backup could be damaged or lost, while an offsite backup provides the means of an emergency restore if all else fails.
- Typically, cloud backup solutions offer near unlimited storage to their users. For instance, Backblaze, when used under the default configuration, or the one-year history setting, offers you unlimited storage, at no additional charge.
- Offsite cloud-based backups act as a set-it-and-forget-it backup. With Backblaze, you configure the application once, and let it run in the background, saving all the changes to your machine without further input.
Recap
Backups are an important and useful tool, helping prevent data loss, and reducing the need for expensive data recovery in a disaster scenario. Keeping frequent backups is a great way to avoid paying data recovery fees, and often can be significantly faster, too. Backups can be a little bit of a challenge initially, but once they’re set up, most backup solutions, such as Time Machine and Backblaze, will silently continue to protect your data from accidents and disaster.
If you need assistance with setting up Time Machine, or would like to have assistance configuring Backblaze, we here at MacEdge would be glad to help! You can schedule an appointment for TechBytes on our website https://www.macedge.com/ and one of our skilled Support Experts will help you find the perfect solution to protect your precious memories.
Check out these other articles for more useful information; Avoid Scams on a Mac, Quishing, and iCloud Password Management.